Wednesday, December 9, 2009
Saturday, November 21, 2009
Creative Crates Giveaway
I know I have been MIA for a while, but I'm back now!
The Creative Crate is hosting a super cute giveaway! Check it out here!
The Creative Crate is hosting a super cute giveaway! Check it out here!


Friday, October 30, 2009
Magnetic Paper Dolls
Check out this adorable magnetic paper doll over at Skip to my Lou
Such a cute idea! I have a Cricut, and never thought about using it on magnet sheets!


She even made a cute holder for it!

Wednesday, October 28, 2009
Super cute bracelets
Blue Cricket Design did these adorable bracelets!
Its made out of just chunky plastic bracelets and scraps of fabric.
It's such a cute thing to do with the girls bracelets that are in their dress up box.
When they are at school, I'll have to get them out and make some of my own!
Its made out of just chunky plastic bracelets and scraps of fabric.
It's such a cute thing to do with the girls bracelets that are in their dress up box.
When they are at school, I'll have to get them out and make some of my own!

Monday, October 26, 2009
Make your own gift bow
So my computer has been down, but now I'm back!
Someday Crafts featured this awesome bow from How About Orange, and I just had to share! It's so adorable!
Someday Crafts featured this awesome bow from How About Orange, and I just had to share! It's so adorable!

Learn how to make your own here. 
Friday, October 16, 2009
Treat Buckets
This is such a creative use for old ice cream buckets! I love cute ways to reuse things!
The tutorial is found over at Brown Paper Packages

The tutorial is found over at Brown Paper Packages

Thursday, October 15, 2009
Cute Reversible Skirt

Wednesday, October 14, 2009
Candy Corn Bark
Candy Corn Bark!
I saw this over at The Idea Room and thought that it was such a great idea! For the instructions, check it out here. It looks delicious! Can't wait to try it!
I saw this over at The Idea Room and thought that it was such a great idea! For the instructions, check it out here. It looks delicious! Can't wait to try it!
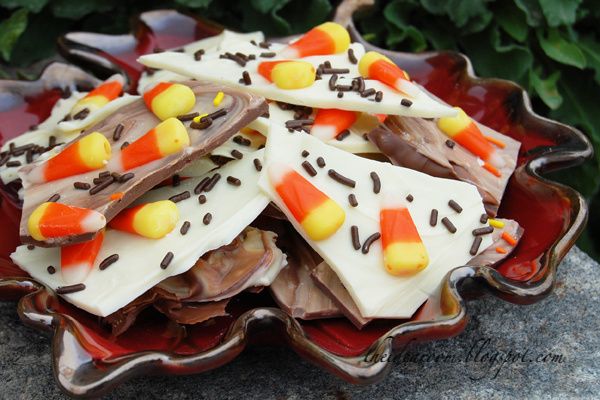
(She also has instructions on Peppermint Bark & Oreo Bark!)


Saturday, October 3, 2009
The Start of my Halloween Decorating
My Halloween Garland!

So I have been saving toilet paper rolls for a while now (I'm surprised my husband hasn't questioned it though) and have been waiting to think of a really cool project to do with them. I found one!

So I cut it in half, then covered it in orange scrapbook paper. Once it was dry, I poked a hole in each side and stuck wire through it.

Then I drew on a pumpkin face with a sharpie (none are the same!) and tied a green ribbon around the wire.

After finishing the pumpkins, I cut out ghost shapes, glued on googly eyes, and white glitter, (because who doesn't love sparkle?!) and stuck a wire through the top
 Then I hung both the pumpkins and the ghosts on my garland over the fireplace (yes it's been there since Christmas, but I decorate it for each season!)
I'm also doing the Fall Festival at DIY Show Off. Check it out!
Wednesday, September 30, 2009
Paper Plate Pumpkins
We have started making our Halloween decorations!
I love Halloween!
 This is such an easy project for any age!
Just paint some paper plates, and glue on the face. (I pre-cut them for my girls)
I love Halloween!
 This is such an easy project for any age!
Just paint some paper plates, and glue on the face. (I pre-cut them for my girls)
Tuesday, September 29, 2009
General Conference Goodies
Stephanie at Somewhat Simple made these great General Conference goody crate & I thought that this way so cute! To see the blog in it's entireity go here
Such a cute idea to give as a visiting teaching gift!
Thanks for the cute idea!
Such a cute idea to give as a visiting teaching gift!
Thanks for the cute idea!

Friday, September 18, 2009
Dresser
The girls wanted to paint this dresser. Bex wanted yellow & Kenz wanted pink, so we compromised.


Saturday, August 22, 2009
Painting Grams Livingroom
Gram wants to repaint her living/dining room with the sponge technique, so I took her to Home Depot to get paint colors. She wanted Browns and Golds.
So we started with the 2 base coats she liked and we broke it into squares so that we could experiment with the top colors she liked.
So we started with the 2 base coats she liked and we broke it into squares so that we could experiment with the top colors she liked.

This was the first square. She didn't like how dark it is, so we kept going.

This is what the wall looked like after we tried out all of the colors she liked. (Her faves are the top right 2)

It's a lot of work, but I had lots of fun doing it...plus, she watched the kids while I did it, so I had some time to myself :)
Friday, August 21, 2009
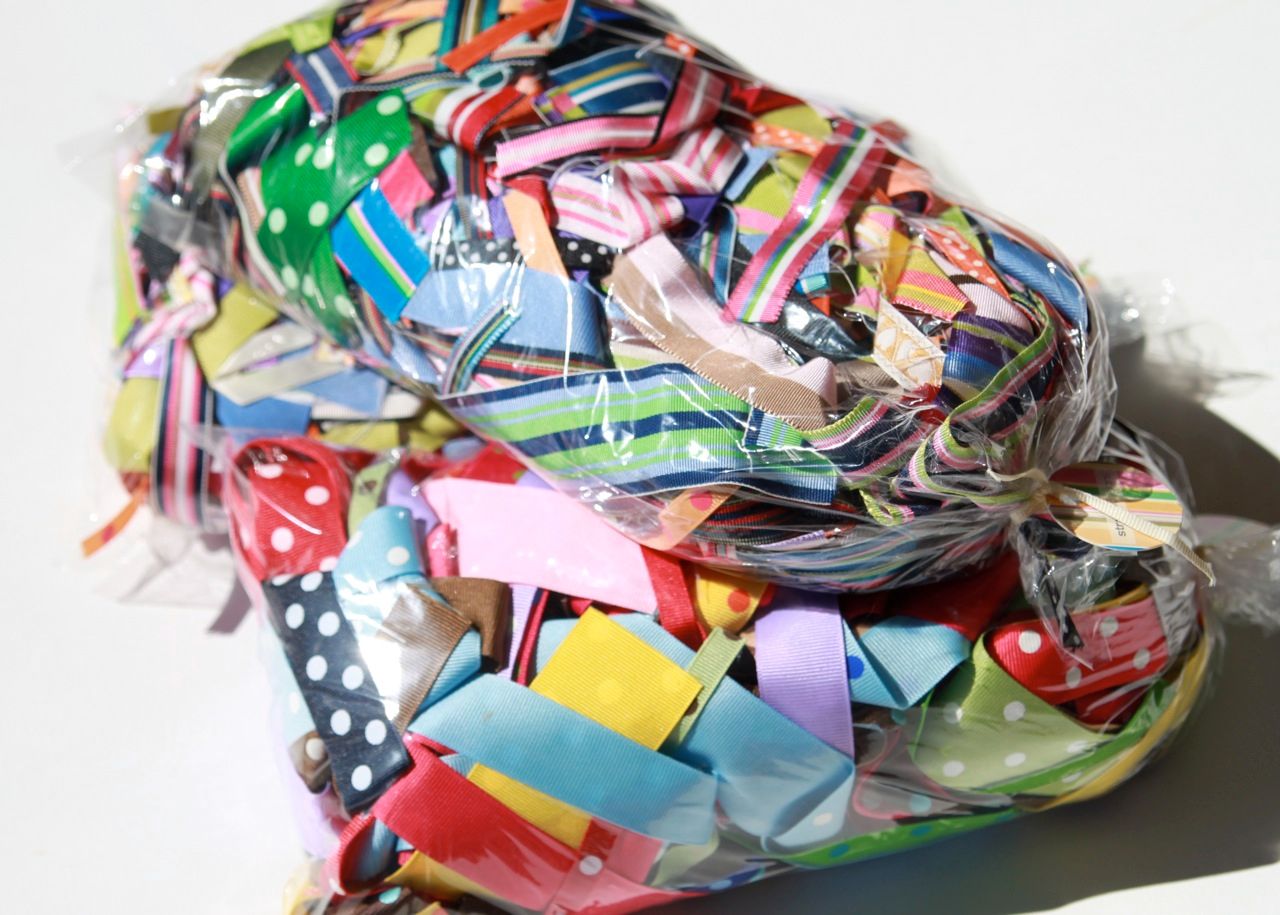
New School Backpacks
After looking at tons of backpacks (and their prices) I figured that I didn't want to spend that much money on a backpack for a kindergartener, when the chances are that it won't be used for anything very heavy for such a young girl. So, when I walked through the grocery store today and saw a cheap ($4) plain black backpack, I thought...perfect! So I bought 2. I forgot to take pictures of the before though! I decorated them in my girls favorite color ribbons.
Pink and sparkly is totally my 5 year old! So, that's what she got! Lots of pink, lots of sparkle and of course the bling!


My 2 year old is all about yellow, she's not quite as into all the sparkle, so hers is toned down. But perfect for her likes! If she wants more color or sparkle, I'll be glad to add more, but I think she'll be happy.

Thursday, August 20, 2009
My Scarf
Here is the scarf that I crocheted for myself. I love the fuzzy soft feel!
 (It's made out of the Fun Fur yarn)
Saturday, August 15, 2009
Wind Spinners
We made our own wind spinners out of paper plates to show the wind outside.
We started with a plain white paper plate
We started with a plain white paper plate

Then we colored them with crayons. (We didn't use markers because in Washington the air is so damp, I didn't want the colors to run!) Color the whole plate though since it will be cut.
 After the plate is colored, cut it from the outside spiraling in to the center. Leave the center big enough to punch a whole in the center.
Tie a ribbon, string or yarn through the hole in the center


Tie it up outside and wait for the wind!


Friday, August 14, 2009
Scarves
I have started to teach myself to crochet. I bought myself a beginners book and some yarn and made my girls scarves. I'm currently making one for myself out of the fuzzy fur yarn. But here's the completed ones.


Tuesday, July 21, 2009
Noodle Neclaces
As a fun project for the girls, we made noodle necklaces. I bought two kinds of noodles, one that looks like a flower and one that could be a stem.
Mix Rubbing Alcohol and Food Coloring in a Ziploc bag


Add in the noodles and mix together. Lay out to dry. (Preferably not on anything that will stain since the color takes a while to set!)

Leave the colored noodles out to dry for a few hours. (I waited overnight just to be safe)

Then let the kids string them up and tie it off. The kids love to make them, and they are so easy!
(Just beware of fingers getting stained when you use the food coloring)

Subscribe to:
Posts (Atom)